Control Blackmagic Cameras with an Arduino, ThinClient, and Custom Frontend Easily control your Blackmagic cameras with a unique combination of an Arduino Uno, a Fujitsu Futro S920 ThinClient, and a custom Angular frontend application.
The Idea
The Idea Blackmagic cameras are known for their high-quality video and versatility, but controlling them can sometimes be a bit cumbersome. While Blackmagic provides an SDK board for an Arduino Uno to help control their cameras, there’s still room for improvement in terms of user experience and ease of use.
I created a solution for a complete camera control system using an Arduino Uno with the Blackmagic 3G‑SDI Shield for Arduino, a Fujitsu Futro S920 ThinClient, and a custom Angular frontend application. This setup allows for convenient control of your Blackmagic cameras, whether you have one or multiple cameras in your setup.
The Hardware


The setup consists of three main components:
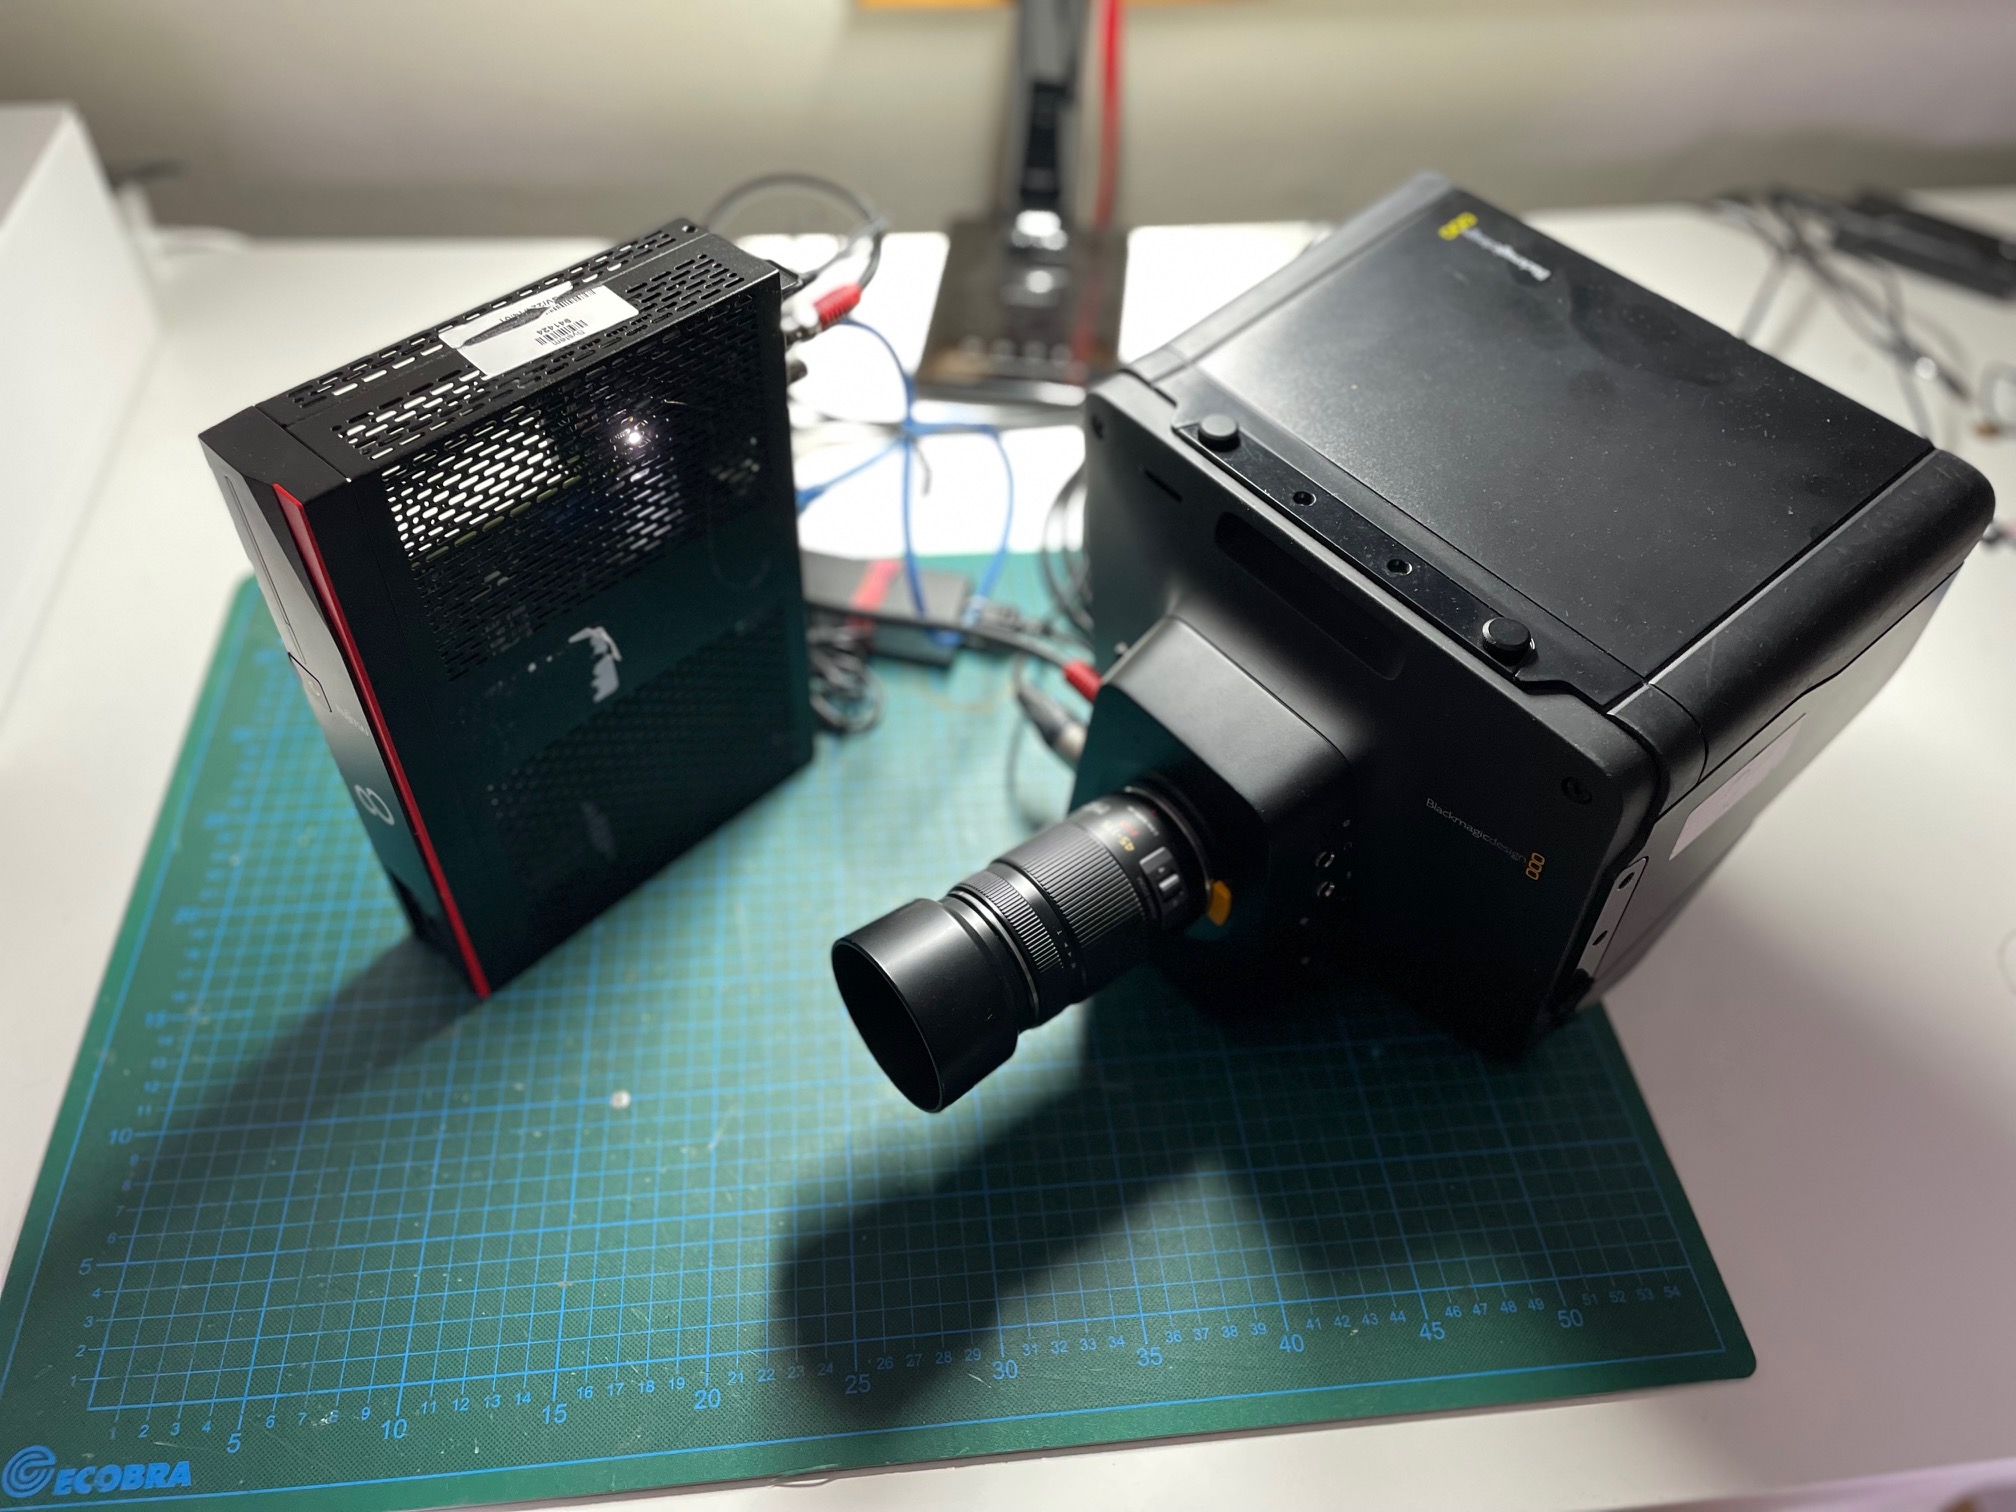
- Arduino Uno with the Blackmagic 3G‑SDI Shield for Arduino: The Arduino Uno is connected to the Fujitsu Futro S920 ThinClient via USB and has the Blackmagic SDK board mounted on top of it. The Arduino runs a custom sketch that receives commands via serial communication and translates them into commands available in the sdk library provided by Blackmagic.
- Fujitsu Futro S920 ThinClient: This compact computer features 8GB DDR3 RAM and a 128GB SSD, providing enough power to run the backend and frontend software components. It also houses the Arduino Uno with the Blackmagic SDK board inside its case. The ThinClient runs a lite version of Ubuntu (Ubuntu MATE) and hosts the backend and frontend software components, as well as the tally listener.
- Blackmagic Camera(s): Any Blackmagic camera that supports SDI control can be used with this system. We have tested it with Blackmagic Studio Cameras.
The Software
The software solution consists of several components:
- Arduino Sketch: A custom sketch, Commandparser.ino, receives commands via serial communication (USB port) and translates them to the commands available in the BMDSDIControl.h library provided by Blackmagic.
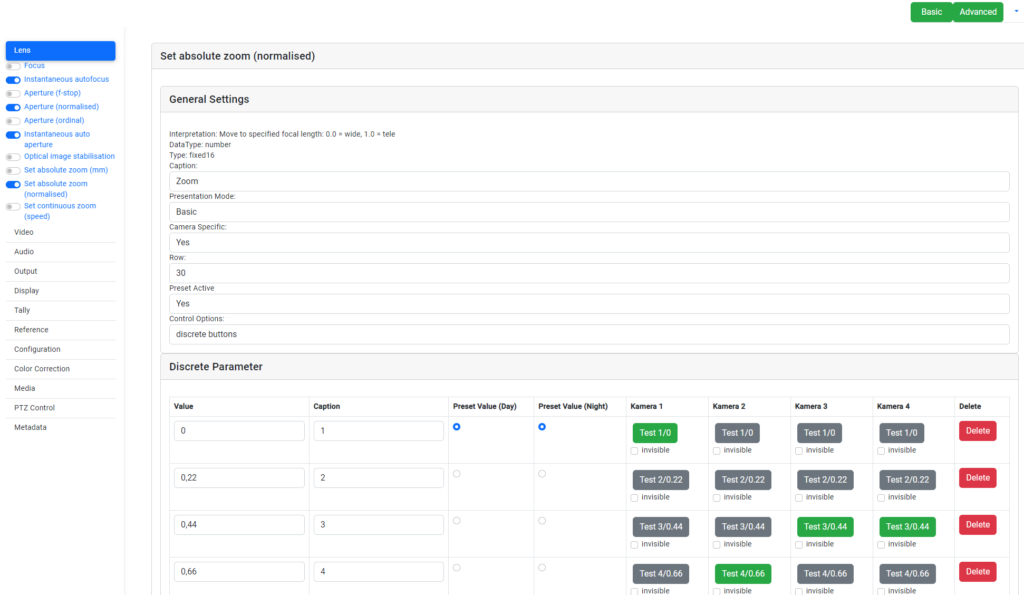
- Backend: A Python FastAPI HTTP server with several endpoints to control the cameras and manage their configurations. The backend can be started by running main.py, and the available endpoints can be found in the postman collection. The configuration of the available cameras and their corresponding names are stored in the config.yaml file.
- Tally Listener: A Python script that connects to a vMix software via TCP to subscribe to changes in the current tally light and sends the changes to the backend. The tally listener can be started by running main.py and configured in the config.yaml file.
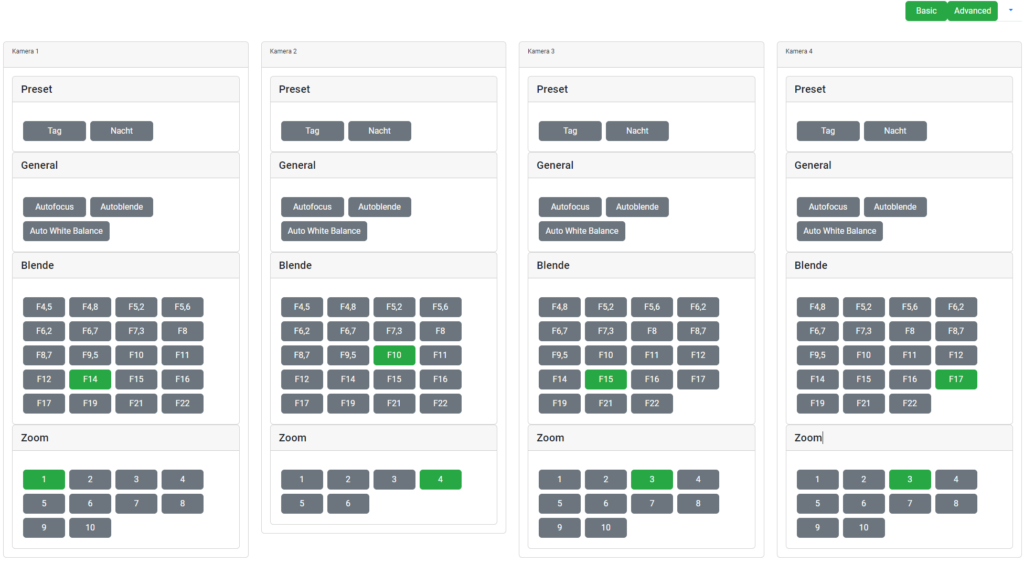
- Frontend: An Angular application that visualizes the structured data from the backend’s “/groups” endpoint, allowing users to configure and control the cameras using a web-based interface. The frontend can be started by running ‘
Get Started
To set up and control your Blackmagic cameras using our solution, follow the steps in the GitHub repository. Once everything is up and running, you’ll have a powerful and easy-to-use camera control system at your fingertips.
Whether you’re a professional videographer or just someone who wants more control over their Blackmagic cameras, this unique combination of hardware and software is a game-changer. So get ready to take your camera control to the next level!